| Chamäleon Observatory back to the
atlas Image acquisition + Processing HOME CHAMÄLEON |
||
|
|
The technique of video photography of the moon, the sun and the planets is relatively new. Amateurs use this technique called Lucky Imaging since about 2005. It comes - like many other things - from the professional astronomy. It was used by the professionals to resolve close binary systems at the theoretical resolution of the used telescopes.
The idea behind it is in principle quite simple. Instead of one image there will be taken hundreds or thousends of images with a very short integration time. Due to the short exposure times, the air turbulence (seeing) will virtually be "frozen" at each frame, because the seeing conditions do not change very much within several milliseconds. More informations about the seeing can be found in two tutorials here.
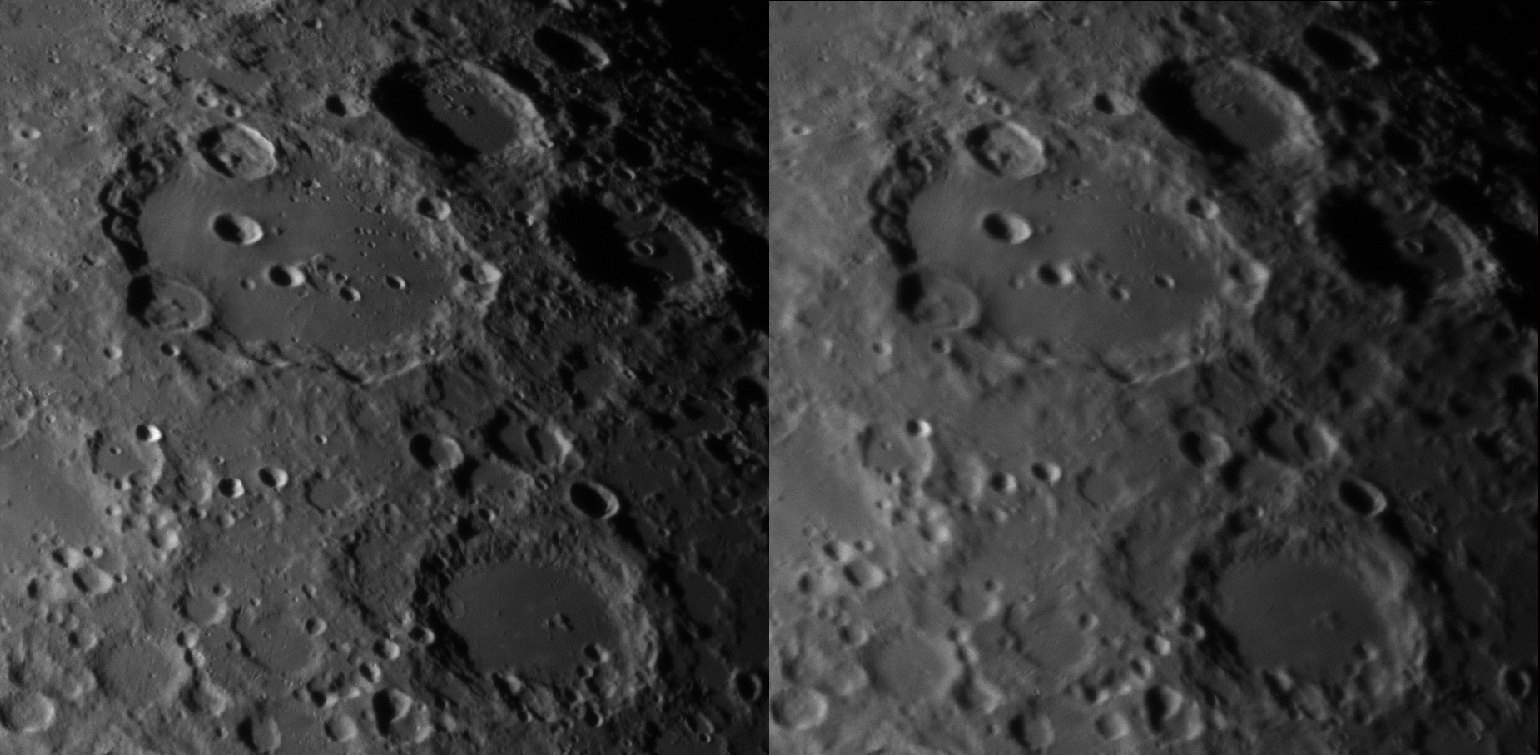
| As a
result of the short exposure times, the individual single images are very
noisy. If one has a software that filters out the sharpest of the many frames
and added these to a resulting image the noise will be greatly reduced and the
theoretical resolution of optics can be achieved (in the best case). With
amateur equipment, the lucky imaging works unfortunately only at bright
objects. » The images on the right show the best (left) and the worst single image (right) of an 1200-frame avifile. The images differ not only in focus but also in contrast. The less sharp image shows a significantly weaker contrast. Click here to load a larger version. |
 |
To present lunar images of highest quality on a "foreign" monitor is a balancing act as we known from our own experience. Other settings of contrast and brightness - with respect to the image prcessing monitor - can lead to "hard" representations. Differences in brightness can be too strong or too weak, black areas can be grayed out or noisy. All images here were edited on two relatively high quality EIZO 21 inch monitors and show up on the monitors of some friends approximately like on our screens.
To view the images as good as possible, adjust your monitor so that the gray scale from white to black appears well graded.
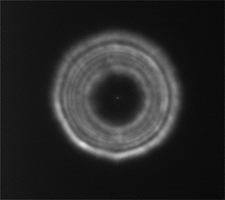
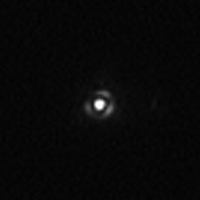
| Collimation The Nuts and Bolts to achieve excellent rawavis is - in addition to the current seeing conditions - the best possible collimation of the Schmidt-Cassegrain (SC) system. A decollimation is immediately apparent in an unsymmetrical secondary mirror shadow at a defocused star image. With this collimation, as shown in the image to the right, the recording of high-resolution lunar and planetary images is impossible from the outset. Instructions for collimating a SC system can be found numerously on the web. A perfect collimation of the SC system in the focus is shown in the image on the right outside. |
 |
 |
Another important point is the focusing. To avoid problems with the mirror shifting, the telescope was equipped with an inexpensive Baader Crayford focuser. The pre-focusing was done with the primary mirror focuser (always counterclockwise) and the fine focusing with the Crayford afterwards.
Why to focus counterclockwise? While turning the focusing knob counterclockwise the primary mirror moves against gravity (when the telescope looks into the sky) and it is fixed between the focuser and the sky baffle. In this case the mirror can not tilt when the telescope moves. In the case of clockwise focusing the primary mirror is "free" and can tilt.
A further tip: If you need to collimate the SC system, also focus in the counterclock direction. It should be clear, that a loose position of the primary mirror during the collimation leads to a slight de-collimation when the telescope moves afterwards.
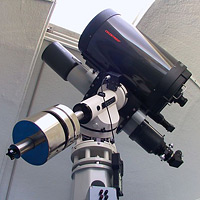 |
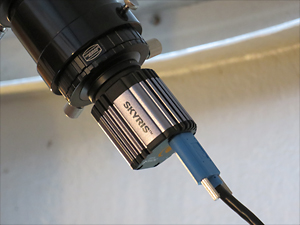
Image acquisition All avi-files were captured with a SkyRis 445 mono video module at a Celestron C14 with a focal length of 3,900 mm (f/11). A Baader IR pass filter was used to calm down the seeing. Other optical components, such as star diagonal or diagonal mirror that could affect the image quality, were not used. Depending on the seeing, the length of the avi-files varies between 1,200 and 1,500 frames. The image acquisition was controlled by the standard ICAP software which is delivered with the video module. The avi-files were captured in 8 bit mode (codec Y800) with a gain of +10 dB. The exposure times of the individual images depend on the Moon phase and vary between 1/80 s at the Terminator 1/500 s for brighter areas. Imaging in 8 bit mode keep the file sizes in the region of 1 GB (with 1,200 to 1,500 frames) and are still good to handle (regarding the computation time in the processing) and saves a lot of hard disk memory. |
| All
avi-files were processed with the software AviStack V 1.8 developed by Dr.
Michael Theusner. The software can be downloaded
as AviStack and is freeware.
The software dates back to 2008 and was approximately published at the same
time as Registax - a similar software package. The first video file processing
software from the German-speaking countries was GIOTTO (see the
links at the bottom of the page). A few years ago we have processed many avi-files with AviStack and RegiStax in parallel and came to the conclusion that the |
Image processing
In the following we briefly describe the image processing of the avi-files with AviStack on the example of the crater Clavius??. Because the programs work about the same, the sequence can also be transferred to RegiStax. These steps can also be used for solar images. All of the images can be enlarged by clicking on it.
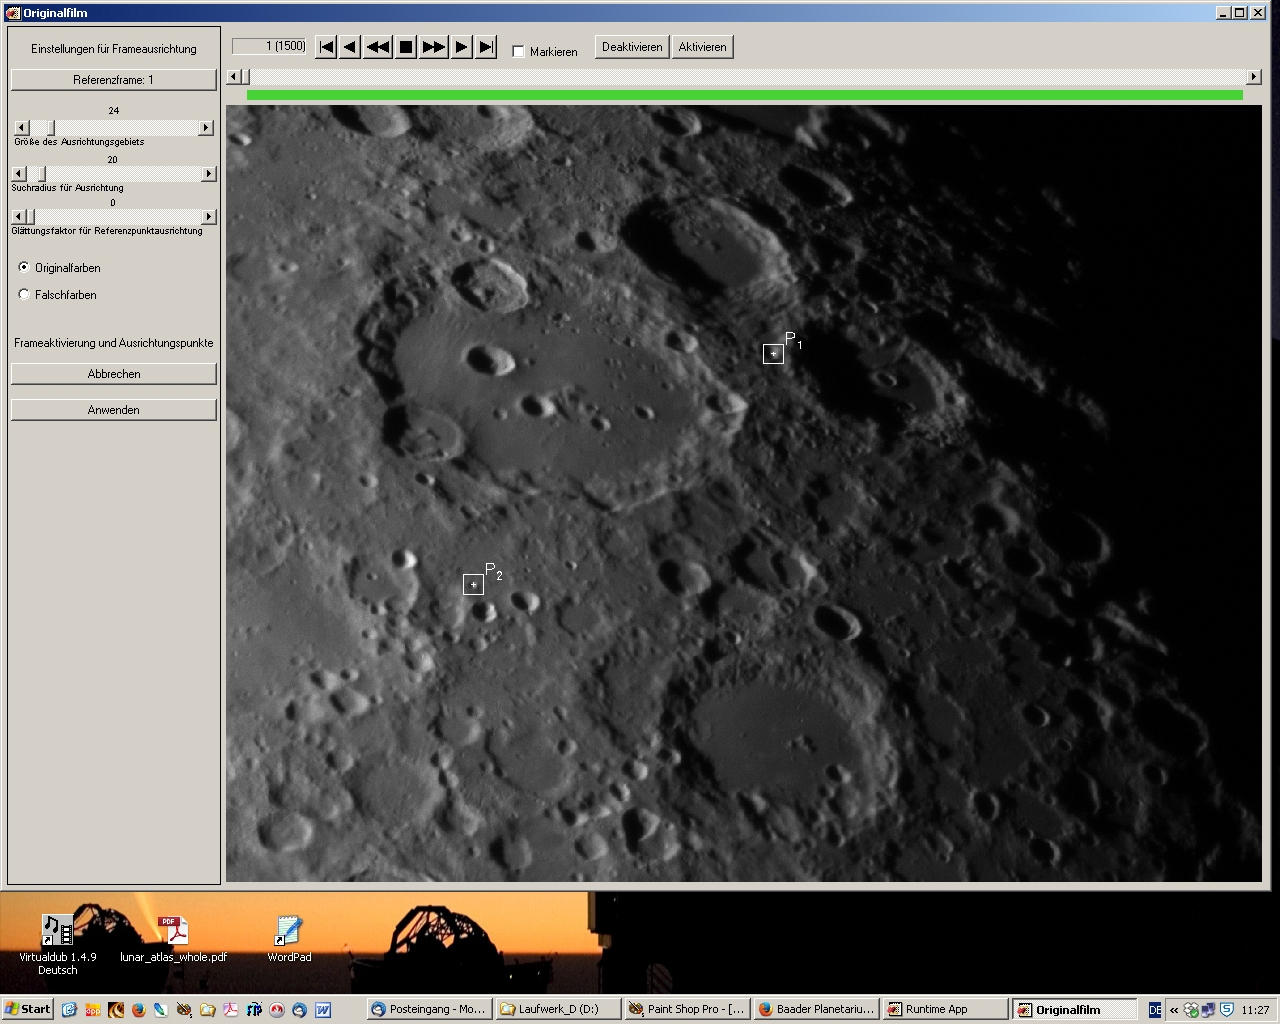 |
After
reading the files into AviStack, two points are manually selected in the first
frame. This is the basis of the automatic determination of the relative
displacement between the frames and the following
alignment. The points should be structures that show a clear contrast (for example, small crater rims between light and shadow). |
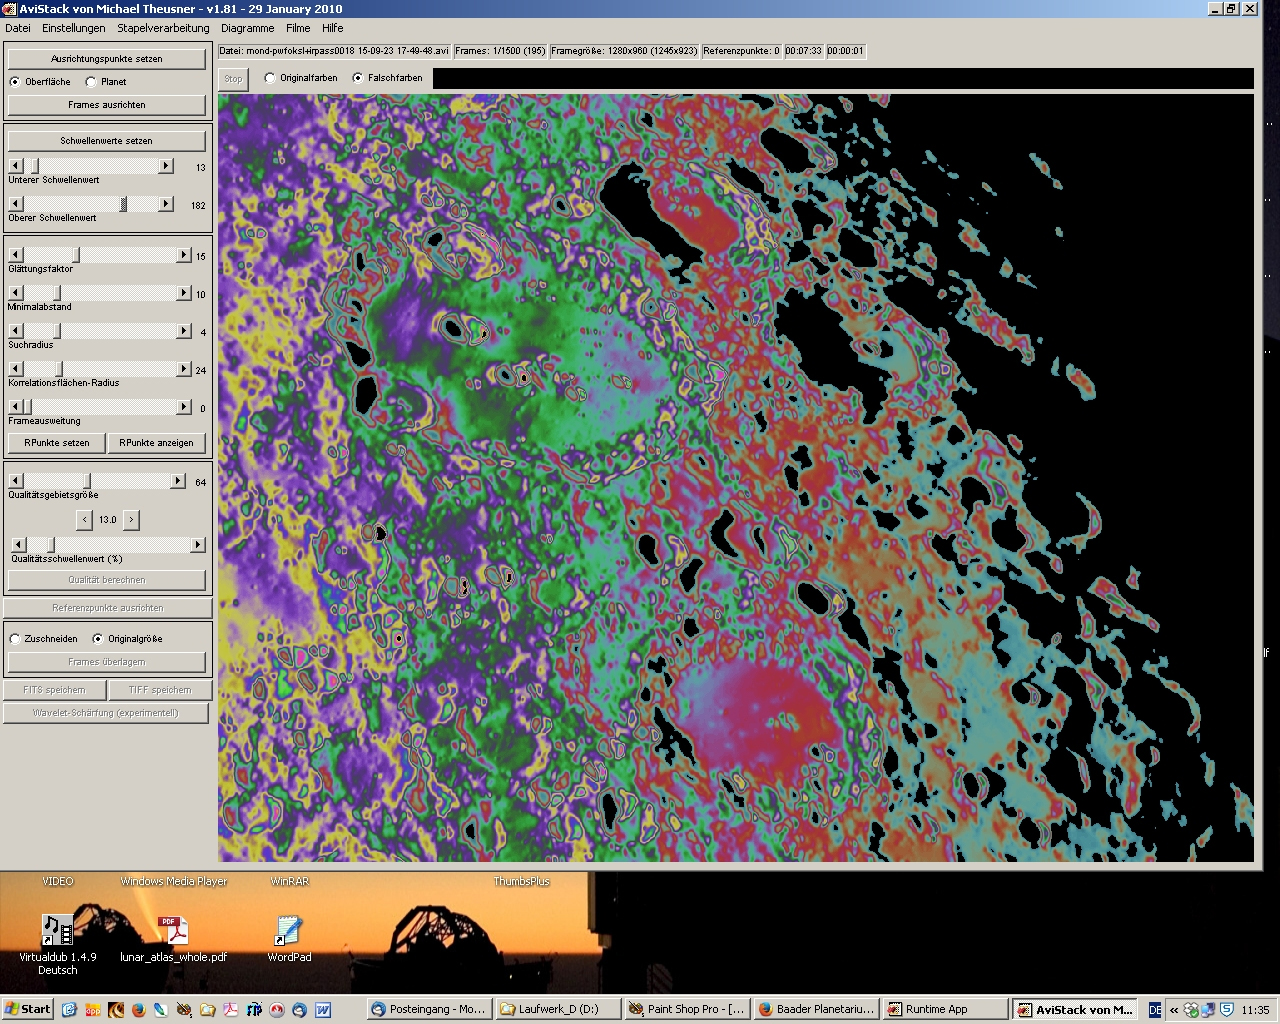 |
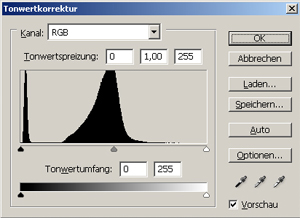
After
completion of the first step the so-called threshold values are set. This is
generally done in a false-color mode. All areas without relevant imgae content
(black sky background and overexposed regions) are marked. No reference points will be set in this areas, which significantly reduces the processing time. |
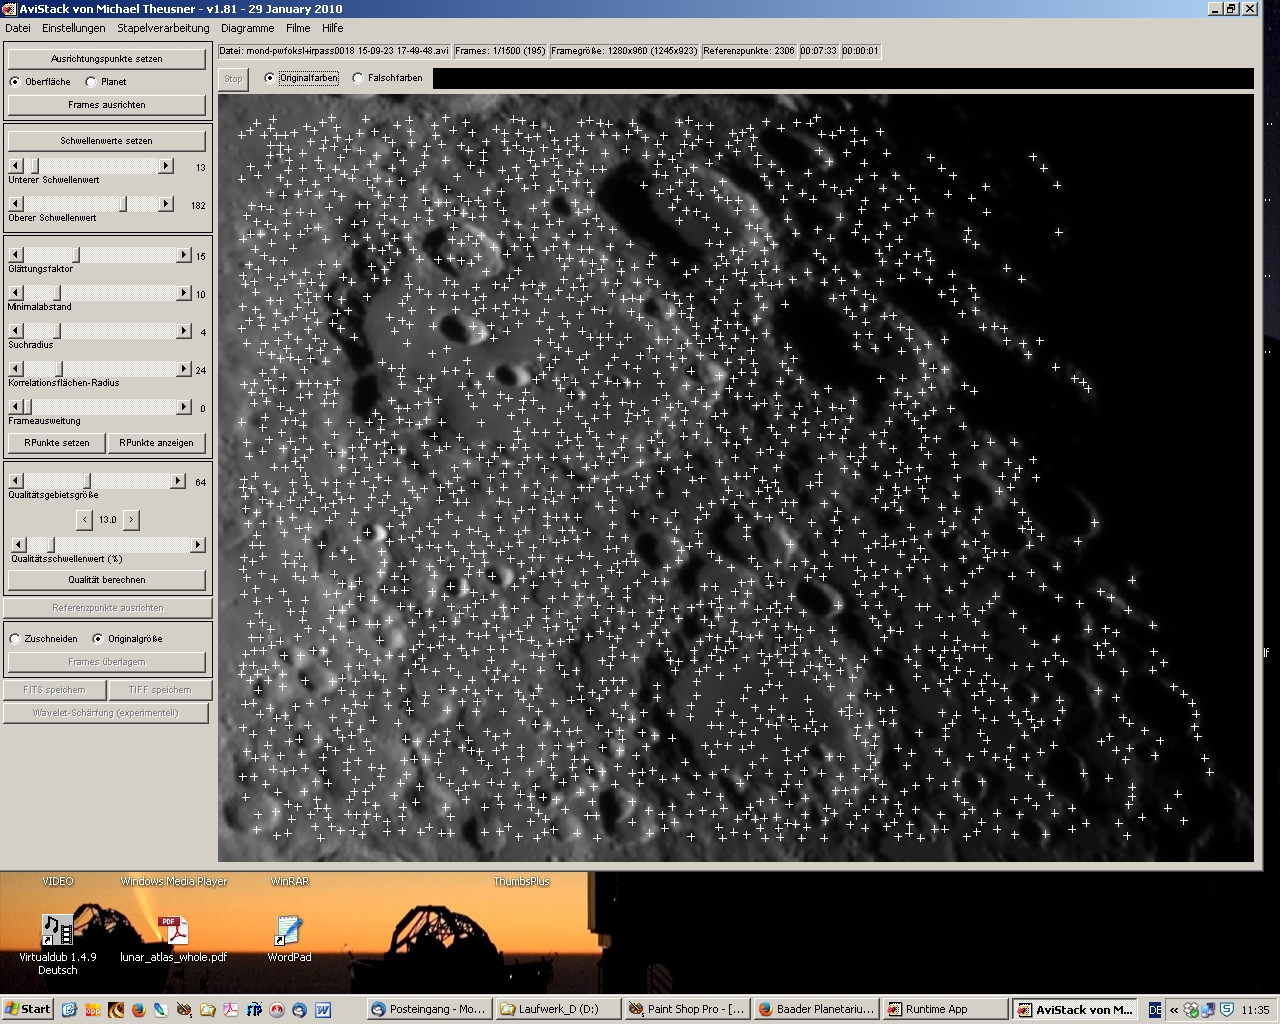 |
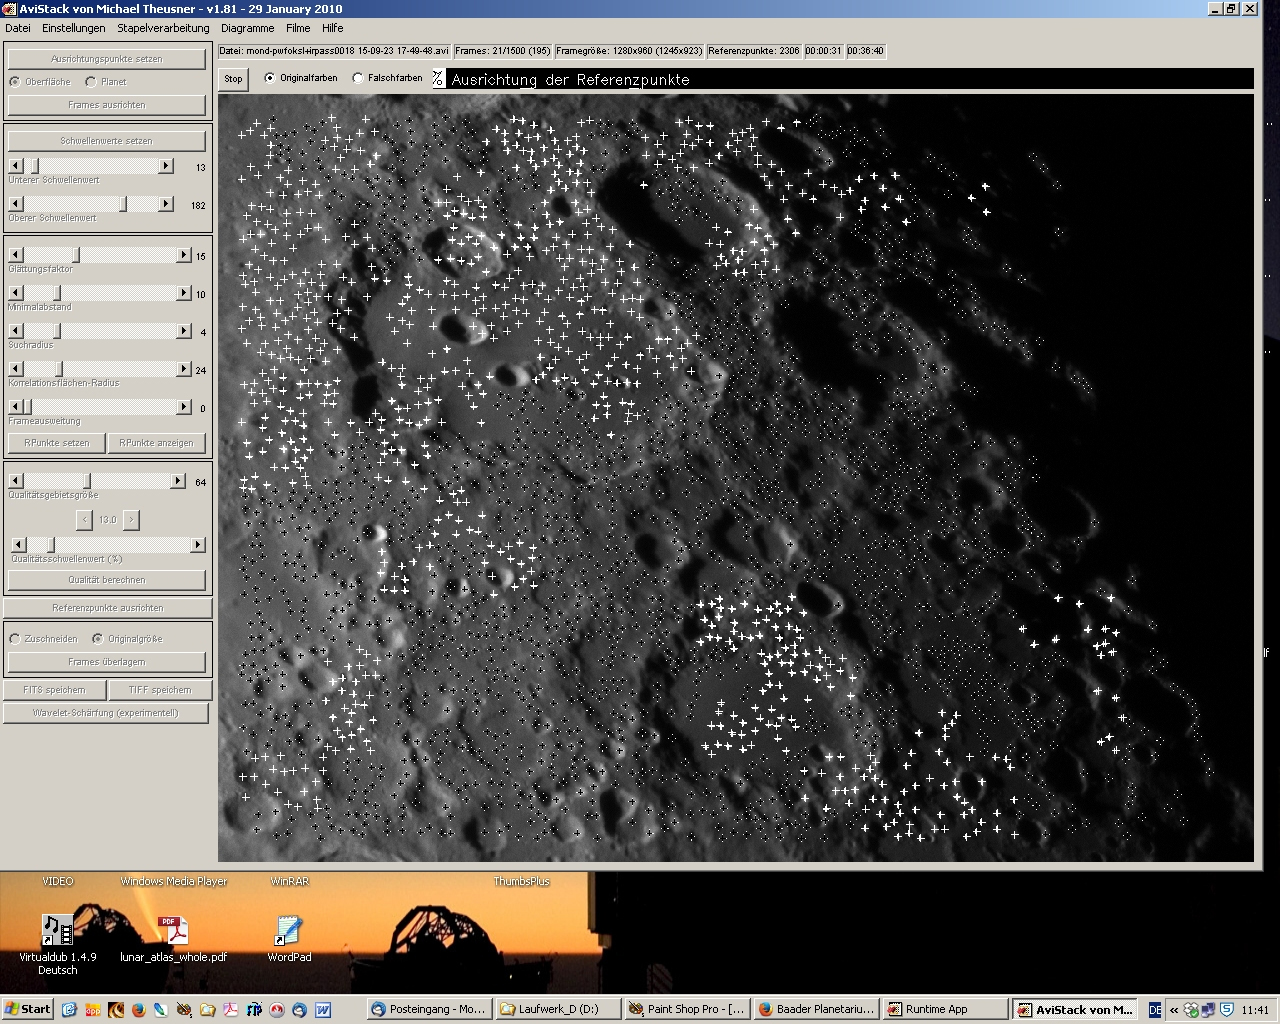
In the
third step AviStack automatically sets reference points for the following
processing. If you choose the default parameters there will be up to 2,500
reference points in an image of 1,280 x 960 pixels - depending on the image
content. Large highland regions of the moon results in a large number of
reference points, smooth mare areas require less reference
points. If the reference points are set, step 1 to 3 can be stored as a data file and can be processed with many other files in the batch mode. |
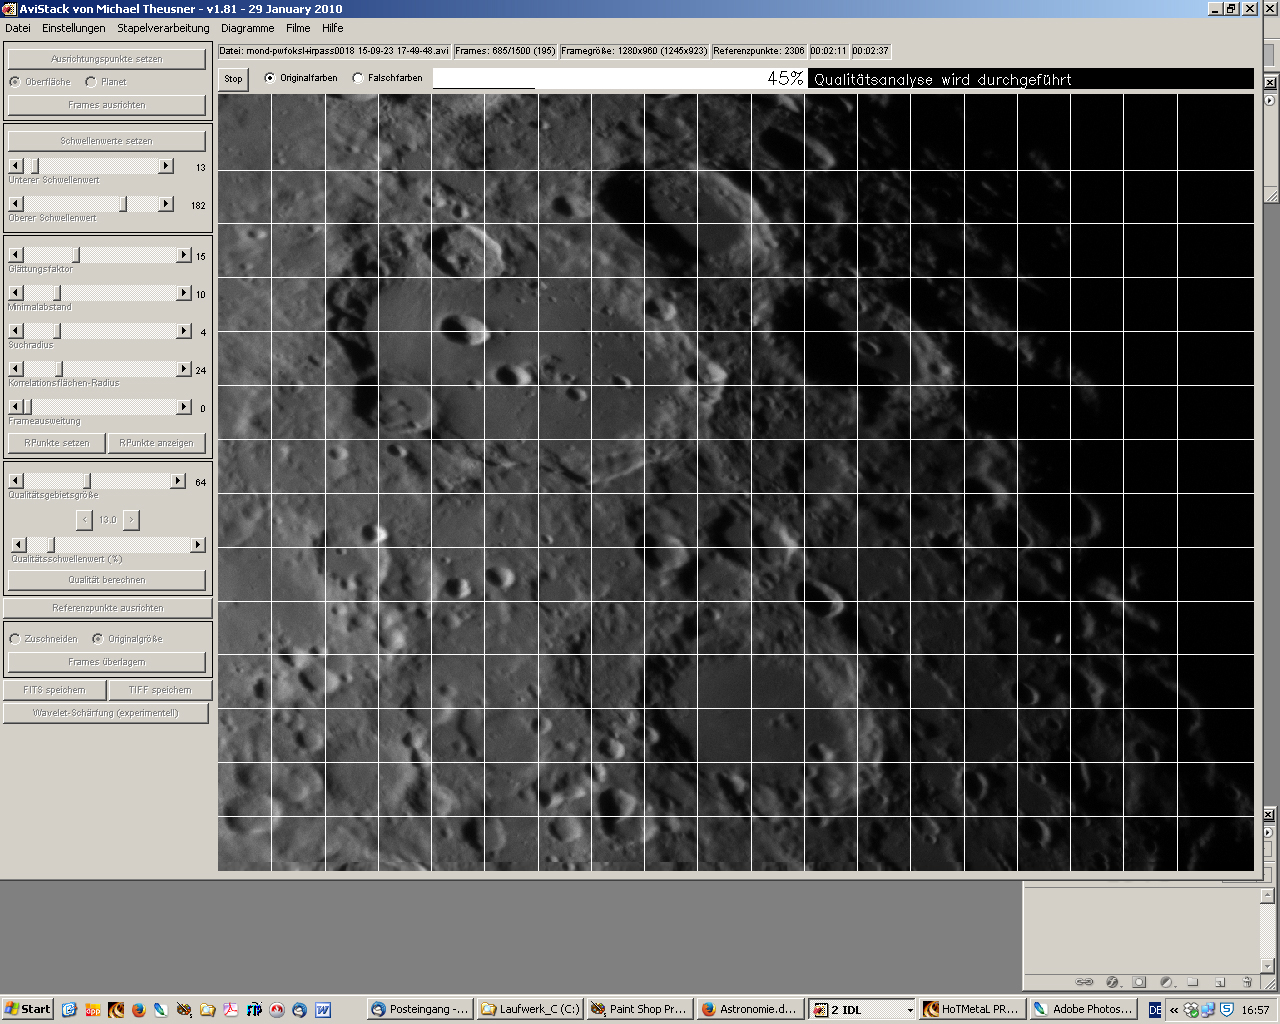 |
In
step 4, the image is divided into squared quality fields. We use a field size
of 64 x 64 pixels. AvisStack determines in every single image and each of the
squares the image quality. The smaller the size of the quality fields, the longer the processing time. |
 |
Now
follows the step which requires the longest processing time. In an 1,500 frame
avi-file of 1,280 x 960 pixels it can take up to 30 minutes, depending on the
computation power of your PC. AviStack now computes the displacement of all the reference points in the quality fields of each of the individual images and move these points so that they are absolutely congruent at the end. |
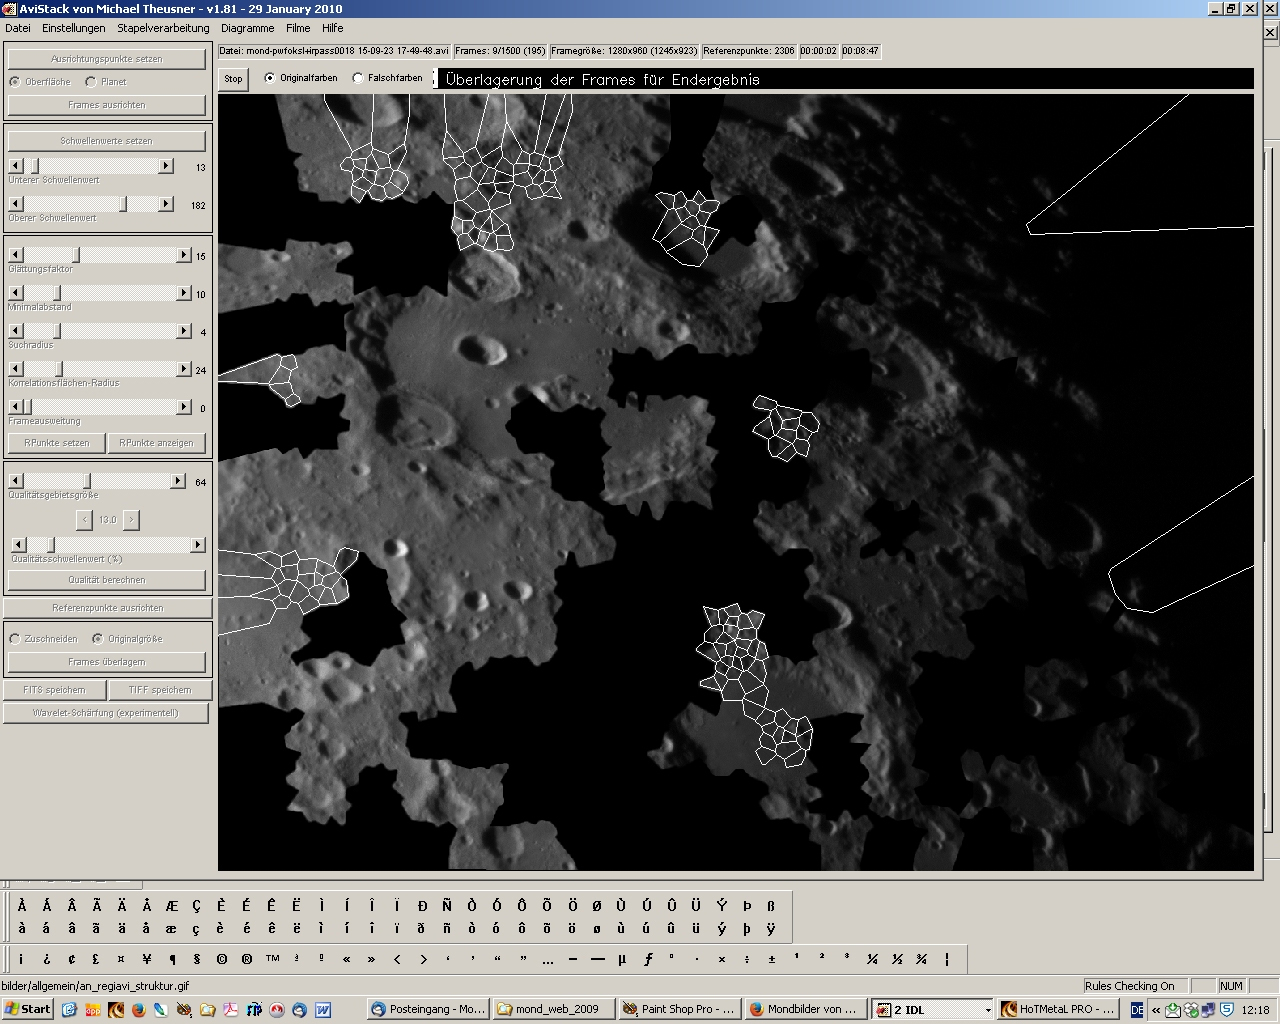 |
It
follows the penultimate step, the image addition. With the slider "quality
threshold", the user can specify how many images are added to suppress the
noise of the individual images. In our case, we add 12 to 13 percent of the
best frames. At the beginning of the lucky imaging, the software packages only added complete frames. Now the current programs only use the best parts of the quality areas from ALL raw images. They are superimposed in such a way that each segment is present in equal numbers in the final image without brightness or contrast differences. Now the stacked image can be saved in a 16 bit .fit or .tif file. In the batch mode the images are automatically saved as .fit file. |
 |
In the
final processing step, the stacked image is sharpened. AviStack as well as
RegiStax provide the wavelet filtering. This is a very powerful sharpening
method where you have a fine control of the amount of sharpening depending on
the size of the structures (fine or coarse). In principle, one can imagine that
the image is devided into several layers with a different resolution and each
layer can be sharpened seperately. In general we sharpen at the 1st level to
the maximum amplitude of 200 with a sigma of 0.2. For images taken at excellent
seeing conditions the 2nd level will be also included. Click here for a comparison between the initial stacked and wavelet sharpened image. |
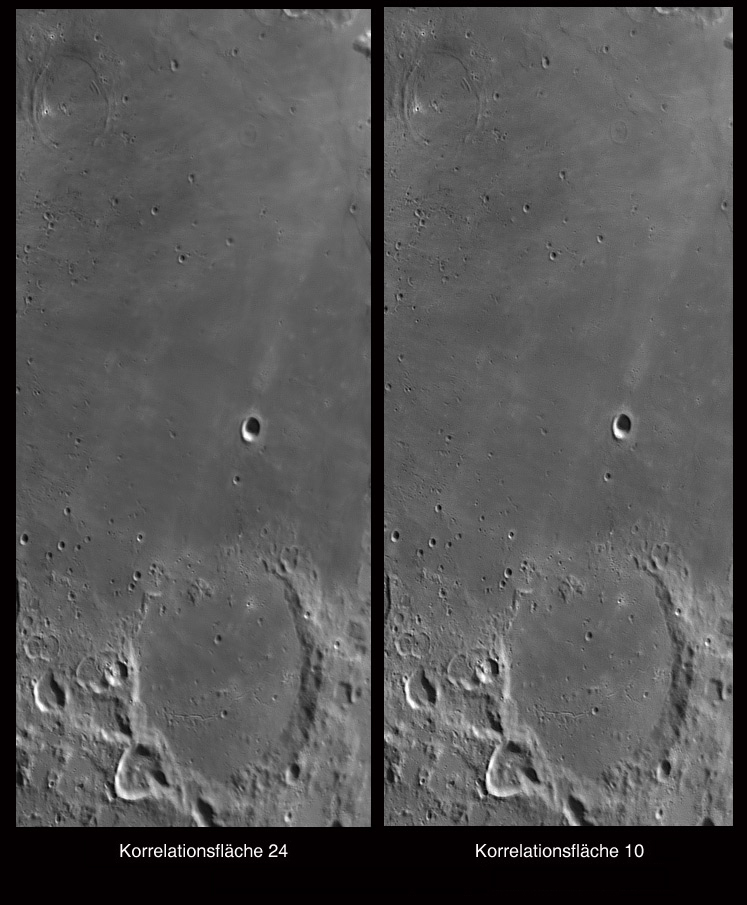
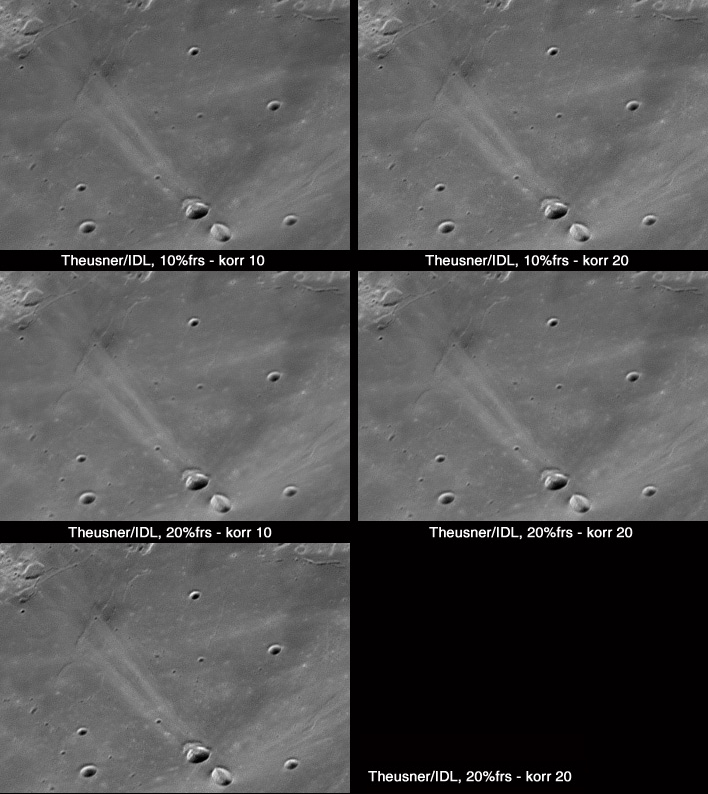
| An
important parameters of AviStack is the setting of the correlation surface
radius. The default value is 24 pixels. In the case of non-optimal seeing
conditions it can be positive to reduce the default value, e.g., to 10 pixels.
The disadvantage is the increase of processing time. The two pictures on the
right illustrate the effect. > Comparison between a correlation surface radius of 10 and 24 pixels on a section of the Mare Nectaris, north of the crater Fracastorius. >> Comparison between different correlation surface radius settings and the number of stacked images. AviStack is named in the caption Theusner / IDL, the images date back to the development phase of AviStack. |
 |
 |
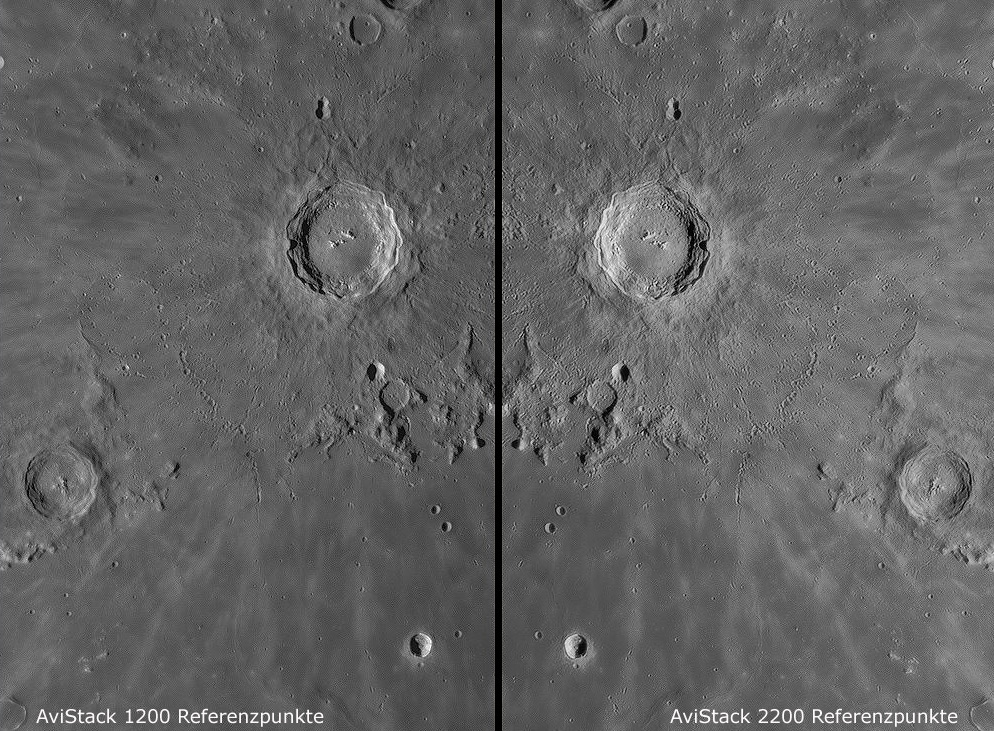 |
The
more reference points, the sharper images? In principle, that's right.
AviStack automatically sets the reference points so it is sometimes necessary
to reduce the settings of the smoothing factor and/or the minimum distance
relative to the default values. This also increase the processing time
significantly. The picture on the left shows a comparison. < Copernicus, taken with a 6" Zeiss APQ with 2x Barlow lens (f = 2,400mm), left 1,200 and right 2,200 reference points. The images are mirrored for a better comparison. |
| At this point we would like to thank our friend Wolfgang Sorgenfrey. Since many, many years, he is one of the very "big" in the lunar and planetary photography. In countless e-mail contacts we received from him many valuable tips and informations that have allowed us to present these high quality images of the Moon. A visit his website is recommended. A visit of his website is recommended. |
| AviStack | programmed by Dr. Michael Theusner - our choice for lunar and solar photography |
| RegiStax | programmed by Cor Berrevoets - our choice for planetary images |
| Auto Stakkert | programmed by Emil Kraaikamp - not tested by us |
| Giotto | programmed by Georg Dittie, with a special sharpness function
"Mexican hat" which is used by many lunar photographers |
| Tutorial | Thierry Legault: Zur Fotografie des Mondes und der Internationalen Raumstation |
| Tutorial | Christopher Go: Moderne Planetenfotografie |